Tuesday, March 29, 2016

Cream Cheese Stuffed Mushrooms

15 comments:

My husband and I love to entertain on the weekends. We have weekly board game nights with various friends, and although we usually get together after dinner so kids are all winding down, we feel weird not having some kind of appetizers and snacks at the ready. Also, we tend to get together with the same people so we don't want to bore them by supplying the same treat week after week.

Therefore, we tend to switch it up every few months. First it was the Bacon Wrapped Cream Cheese Stuffed Jalapeno Poppers, then it was the Bacon Wrapped Brat Bites, but lately we've been on a stuffed mushroom kick!

Previous to a week ago, I'd never made them myself, but they have been one of my favorite starters since forever! I can't go to a restaurant that has them and NOT order them. There is so many different ways of making them, the filling possibilities are endless – but I prefer simple.

This recipe is so super easy! We start throwing it together about 30 minutes before we are expecting company, and they are bubbly and delicious around the time they arrive.

Cream Cheese Stuffed Mushrooms

INGREDIENTS :
1 tbs Olive Oil
16 Portobello Mushrooms
1 block of softened cream cheese
3-4 cloves fresh garlic
¼ tsp salt
¼ tsp pepper
¼ tsp cayenne pepper
½ tsp dried onion flakes
¼ cup Parmesan cheese

Preheat oven to 350.

Prepare mushrooms: Using a damp paper towel, wipe mushrooms clean. Carefully snap stems off, leaving a little crater for filling. Set caps aside.

Finely chop the mushroom stems and garlic.

Heat oil in a pan on medium heat. Add stems and garlic and heat for no more than five minutes, careful not to burn garlic. Thinly spread out in a bowl to cool.

After about 5-10 minutes add cream cheese. Once thoroughly mixed, add rest of ingredients.

On a foil lined baking sheet, spray cooking spray, or wipe olive oil to avoid sticking.

Spoon filling into each cap and arrange on prepared sheet. Bake for 20 minutes.


That's it! These will be such a crowd pleaser or a wonderful side to your steak dinner. These have become quite the staple in our house lately and I'm so happy to share this brilliance with you all!




Monday, March 28, 2016

Review: February Pet Gift Box

6 comments:

This is my last installation of my three month PetGiftBox review, and let me tell you, I still love it!

I have spent the last three months eagerly awaiting the day when a medium sized box appears in my mailbox with my pup's name on it, so that I can spoil him (even more) rotten. Even Gregor knows when his box has come in, he gets super excited and dances around as I open it and present him with the new goodies!


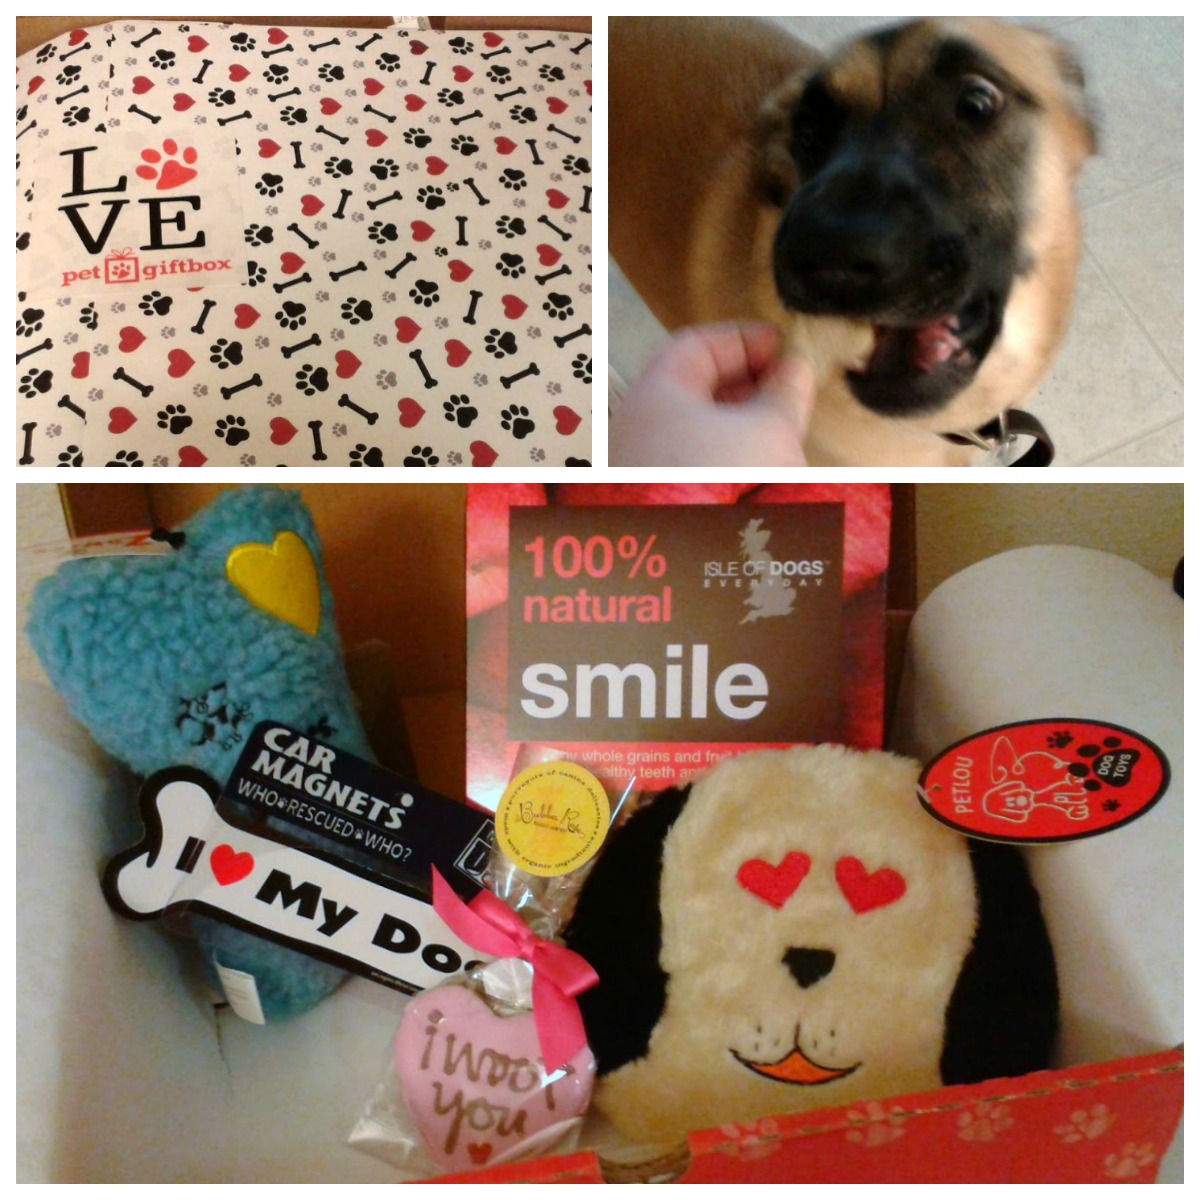
February's box did not disappoint us at all. In it were two types of treats: a box of heart shaped biscuits and a heart shaped cookie, and two toys: a fluffy bone shape and a disk with a puppy face, along with a car magnet that proudly declares your canine affection. Everything was all wrapped up with festive Valentine's Day paper inside the box.

Let's talk about these treats. The first thing I gave my Muttface was the heart shaped Valentine's cookie from Bubba Rose Biscuit Company. It was an adorable heart shaped frosted canine confection that declared “I woof you”. I have to admit, it looked so tempting, I tried a nibble. Not gonna lie, I've had worse cookies that were actually intended for human consumption. Also had better, but for a dog treat, it was rather tasty!


The other treats were a box of heart shaped whole food biscuits from Isle of Dogs that had a blissfully short ingredient list intended to help keep your dog's teeth healthy and breath fresh. These I didn't taste myself, but Gregor seems to adore them, always asking for another after he's finished the first.

On to the toys! There were two toys in this month's box - a fairly obvious fluffy bone shape from Zanies and a disk. While both squeak, only the bone with the heart embroidered on it gets really played with by Gregor.

The disk with the puppy face from Petlou, while it is a perfect flinging shape, is very difficult for him to pick up if it is flat on the floor, leaving him to abandon it after a few tries for a toy that fits his mouth better. The children, however, love it. The squeak is more akin to an accordion's wheeze, and its large disk shape make it perfect for little feet to stand on it and bounce, much to their delight.


The car magnet is a sturdy thing, and one I have proudly placed upon my vehicle, after a few weeks of it being on my fridge as a fidget for the kids while I cook. It's a traditional bone that simply says I heart my dog. Honestly, you don't need to say much more than that.

In all, I love PetGiftBox. Gregor and I enjoy looking forward to our package, and we have so much fun discovering what goodies await us inside. I think that everybody who is looking for a way to treat their furbabies definitely should consider PetGiftBox!

As a gift to us humans, PetGiftBox is offering half off your first box 
when you use the code RCH50.


Friday, March 25, 2016

Putting DIY Sharpie Mugs to the Test (Does This Pin Even Work?)

19 comments:

Like most people I know, I have found myself wandering down the rabbit hole of Pinterest and the DIY portion of the Internet. And, like most people I know, I have found myself saying “Yeah, they make it LOOK so easy; all you need to do is A B and C” and wondering if it ACTUALLY works.

So I've decided to try a few, and see how it goes, then share my experiences with all of you! I figure I'll potentially make a fool of myself and let the internet laugh with me, and you won't have to!

The first project I decided to take on is something I have seen about a bajillion times all over the internet. The DIY Sharpie mug.


The idea is simple: Buy an inexpensive coffee mug, doodle/write on it with Sharpie markers, and bake it in the oven at 350 for half an hour (twice if you really want to set it).

Considering that I am not a very arty person when it comes to drawing (seriously, my stick figures require labels!), I recruited a friend to help me out.

At Target, we found exactly what we were looking for, plain white mugs on sale! We picked up a traditional coffee mug, a cappuccino mug, and a square bowl for each of us and a pack of Sharpies! We got back to my place and started our art project, drawing all over our mugs and bowls. As I anticipated, her stuff looked way more awesome than mine did.

The next part was the easiest thing, putting the mugs in the oven. I put them on a baking sheet in the cold oven, heated it to 350 and then baked for half an hour, then I turned the oven off and let the mugs cool with it. I did it this way so as to not shock the mugs and maybe have them crack with the temperature changes. Is it necessary? I'm not sure. Did I do it anyway? Yup. I'm over cautious that way.

When we pulled them out, the ink was a little smudgy if you pushed hard on it, so we decided to bake them a second time.

After the second bake, the ink was still smudgy, but only if you really tried to smudge it.

So the next test was to wash it. I took the mug I had made to look like it had blood dripping down, and plunged it into hot, soapy water.

I have a general rule of thumb I live by when it comes to washing things: handmade = handwash. Usually I apply that to my knitting and crocheting, but I figured that it should be extended to dishes as well.

Upon inspection, I found many places where the ink had come off. Some along the lip, but most was around the cup. I used a soft cotton knit cloth to wash with, and I didn't think that much would have come off, but you can see for yourself. Just glad I didn't try it out on one of the pretty pieces!


Turning to the Internet to troubleshoot, I found that if you use an oil based marker, like the Sharpie Paint, you get much better results. I guess you live, you learn.

For the dishes we already made, though, I just put a few layers of Dishwasher Safe Mod Podge that I had around the house on over the art, and let it dry, which fixed our smudging and scratching issue.


Are there any DIYs or hacks you guys have been wanting to try, that you've been worried that it might not work out right? Let me know in the comments!