Showing posts with label Halloween. Show all posts

Wednesday, October 18, 2017

Ghostbusters Slimer Pistachio Watergate Salad #Foodnflix

11 comments:


For the past few months, my co-writer Lynda has been participating in the Food n Flix Club cooking challenge, where bloggers get together to watch an agreed upon movie and then make a dish that is inspired by the movie.

It looks like a lot of fun, so when she mentioned that this month's movie was Ghostbusters 2016, I asked if I could take it on. Don't be shocked - buy I may be the only person in the US who has never seen any of them!

So, I decided to watch the original version which came out in 1984, and then watch the newest version which came out in 2016!

The original was out two years before I was even born, and needless to say, it seemed like such an outdated and silly movie!

I mean, after 30+ years, it is crazy to see where film has gone. This movie oh my goodness, I do not even know what to say. It was really hard for me to actually sit there and watch it. The graphics, the jokes, the special effects, oh man! I wonder if some movies have to be experienced when they're enjoying great popularity to really appreciate them?


Watching the updated version a few days later was really fun! I mean Kristen Wiig was in it, and she is one of my favorite ladies of comedy! This version's graphics were bright, colorful and so different from the original. I really liked it!

The storyline tried to mimic the original, but some parts were just so off base, I didn't know what to think of the remake as it might compare to the original (I know some fans of the classic movie had some strong opinions about that), but I liked it fine.


While watching both movies, there are a lot of food references, and you can see people eating things throughout the movie.

What stood out for me was Green Slime (both ectoplasm and Slimer), Pizza, Chinese Food and marshmallows!

I thought I might go the Chinese food route, and follow in the classic scene where they state "this magnificent meal is the last of our petty cash" and try a budget friendly version of Chinese food, or the Wonton Soup issue from the 2016 version.


Or, I could try to make some type of green slime or Ectoplasam but really, besides Jello, I did not know what direction to go with that!

In the end, I decided to do something with Marshmallows because well, Stay Puft Marshmallow Man was the last and biggest threat that the GhostBusters defeated at the end of the movie (twice!).

So with Marshmallows as my food of choice, I thought it would be fun to do something that is also green in honor of the mischievous Slimer who caused such mayhem in both movies.! Keep with the theme right?

There were so many possibilities... I thought of Slimer popcorn with green food coloring into the marshmallows. I thought the obvious Rice Krispie treats, and then I remembered something that my grandma used to make that I was obsessed with as a kid!

Pistachio Pudding or as it is also known - Watergate Salad!! It incorporates the green in the pudding itself and also marshmallows! I knew that my kids would love this idea so decided to run with this one!!  I think it would make a great addition to any table full of Halloween dishes.

It is a pretty simple recipe and takes just a few minutes to prepare it. Win win in my house!

Ghostbusters Slimer Pistachio Watergate Salad
Prep Time- 5 minutes

Ingredients
1 Box of Jello Pistachio Flavored instant pudding
1 20oz can of Crushed Pineapple, Undrained
1 cup of Mini Marshmallows
1 container of Cool Whip, thawed
1/2 cup of chopped Pecans ( or nuts of your choice)

Notes:
*Do not make the pudding as it is stated on the box! The pineapple juice will make up for the milk that is needed in the traditional making of the pudding. As well as the Cool Whip.

*the original recipe calls for the whole can of pineapple and juice. I scoop out the pineapple (not strain) and omit the juice. I find it gets too watery! Your choice!!

* I also omit the nuts as the Pistachio pudding has them in it already and I find it is enough for my family. Again, your choice! More nuts will give this a more crunchy texture.

Instructions
You simply mix it all up.  Take the pudding mix, add the pineapple with the juices. Stir in the mini marshmallows and then slowly fold in cool whip. I add the pecans, if I'm using them, at the very end.

That's it! There you have it. Stick it in the fridge for an hour or so and then enjoy.

This is truly a timeless recipe that I know my kids are going to love! I loved it as a kid and I am sure that yours will to! Enjoy this marshmallowy- green slime inspired dessert!

And go ahead and watch one or both of these silly movies - we could all use more silliness!

Check back on November 2 with Kimberly at Coffee & Casseroles to see the full round up of other Ghostbusters inspired recipes!  I can't wait to see what others did!


Sunday, October 15, 2017

How to: Half Frankenstein Halloween makeup

21 comments:


Halloween is, oh, only the best holiday ever. It is so great, in fact it is my wedding anniversary.  Happy 10 years, babe! For the first five years of my marriage, I did not get dressed up out of respect for the sacred-ness of getting married on that day. Being the makeup artist I am, I decided 5 years is good, and I started getting dressed up again!

I am also competitive, mainly with myself. So every year I have to out-do myself.

Today, I'm going to show you what I did in 2015 for Halloween. I didn’t take enough pics of what I did for last year's awesomeness, so this is what you get, peeps.

The first thing that I do to plan year after year is search Pinterest, YouTube, and Instagram for spooky inspiration. This process usually takes weeks, and I find a few things I like and will create from a compilation.

While researching for this, I found and fell in love with Lex from Made Yew Look. She is down to earth, a great artist, and is fun to follow. I used much her video, and made some tweaks.


FrankensteinMakeup Tutorial (MadeYewLook)

One of the things I did differently was to use liquid latex to create the center wound.  Lex was able to use a Mehron Special Effects kit which I did not have access to. Instead I went to my local costume shop, Disguise the Limit.

Liquid latex is very similar to lash glue. I found that it is easy to build up, so I was able to make the edges of the wound thinner, and thicker toward the center. In the video, Lex cut the wound open, however with the liquid latex, I found it was easier to create the two sides of the wound separately.

The latex does take quite a while to dry, so ensure you have about 32 years available. (hah!)

I did my eye makeup before hand, but realized later that I could have better used my time creating the wound, then doing the eyes.


I did them smoky with purple, inspired by Lex, and color theory. Purple is a great compliment to the green. Lex used a cooler green than I did, as was the purple, I went with warmer hues to make it a bit more different.

The liquid latex dried a milky clear, and absorbed any color I laid over it very nicely. I used a primer all over first, then mixed a green and white face paint with my regular foundation for a hue of green.

I contoured with green face paint at the hair line, cheek bone and jawline, then set with a translucent powder. I then used a variety of green eyeshadows to create more depth with further contouring. For blush I used a very bright pink just on the apple of my cheek.

As Lex showed, I used a brown eye shadow in the center of the wound before using fake blood, though I decided I should have used more to make the blood darker.

For the stitching, I found the thread I had, even though it was thick, was still too thin. I used a sparing bit of liquid latex as glue to triple and twist the thread. I used a brown eye liner to create the "holes" that the stitching needed.

I made the string too long in my practice round, but loved that as I made faces, and changed expression, it showed that the thread was real stitching, not just drawn on lines.

I used the Liquid latex as glue to attach the thread to my face where the stitches would enter the wound.

I did a basic beauty makeup for the other side, adding a plum color eyeshadow, and blush on the far side of the wound, to create "irritation" to the skin. Add realism.


Taking the wound off was easy an relatively painless. Again, think lash glue. Or Elmer's glue when you were a kid, and had to peal it off. What is super cool, is the stitching came off at the same time.

I am so glad that I practiced before the big night.

I got a better feel for the makeup I don’t use daily, latex, blood, stitching, green all over my face…

I also looked at other Halloween makeup ideas, and decided I wanted more drama with veins.

For the veins, I took a basic triangular sponge, gouged irregular holes in it. I then dipped the sponge in a dark green eyeshadow powder, and sponged the veins in place, never going over the same place twice.

Again, I like the drama, and am competitive, so had to out do my practice round.

This was accomplished with a better executed wound, but then I also extended the center wound down my chest, onto my collar bone, and on my hand.

I used a liquid liner to create cracks coming off the wound, and eye.

I used more brown beneath the blood, and extended the veins onto my chest.

On the Frankenstein side I used dark green to vein, and on the beauty side I used purples, and a deep red color shadow.

I already had purple contacts, and decided again to be like Lex and go with the yellow eye. Everywhere I went, they were out of neon green, my first choice. The result was still awesome though!

I have no idea what I will be doing this year, as usual I will go big, not home.

I still have tons of the liquid latex even after a practice round before the big night, so I plan on using that again. That’s about all I know!


Monday, October 24, 2016

Simple Halloween Decor

13 comments:

This summer, my husband and I sold our house and moved to a much smaller apartment that was more centrally located to public transportation and an interesting social life.  We're enjoying it a lot, but it is still an ongoing challenge to learn to live smaller and more simply, and we're still creating our 'look'.

But holidays come when they come, ready or not, and while I am not able to totally deck out the place for Halloween, this is still my favorite time of year, and I wanted have a few touches.  I keep a bin of Halloween decorations (now living in an offsite storage room), and rooted through there to see what I could use, and we wound up buying an item or two that caught our eye, and this is what we came up with:


We'd just set up this shelf arrangement near the door shortly before it was time to decorate for Halloween - we needed a place to hang keys and our dog's leash, as well as have a landing zone for my husband's loose change.  So, when it's not Halloween, we have this row of hooks (that are actually dog butts) for the hanging items, the rustic blue crate shelf that holds two little stoneware cups for change (one of them is specifically for quarters for the laundry room), as well as a sign about dogs and a dog motif cross stitched piece I did.

We didn't take down any of it, but I did add an additional cross stitch piece, a couple purchased raven items, some fresh mini-pumpkins (now sitting on the upturned change mugs, so there went that bit of organization), and some artificial autumn sprigs from my Halloween bin.

The thing I like about this is that the shelf and dog butt hooks are fastened to the wall, but everything else just sits on it, letting me change out the decoration without putting any more holes in the wall.

On a small end table that sits to one side of the living room, I tucked some artificial sunflowers and other seasonal sprigs inside our tripod lamp.

A beat up hanging clock (from Michael's), another older cross stitch piece I did, and a small ceramic skull created a nice, shabby Halloween still life that will transition easily into November with the removal of the skull.

On a whim, I covered the shade with a black lacy poncho-style shawl of mine.  It provides a little more atmospheric l
lighting down in  that part of the room.

Nearby, we have an IKEA ladder that is currently rather overflowing with things (we're still deciding what it is we want to do with that space).  I had a length of grapevine garland and several ornaments which I'd normally put up on a year round tree I like to decorate each season.  Here, we just have no space for it, but I was sad to not get to show off my ornaments, so I draped the garland around the top of the ladder and hung them off of that.


Our biggest addition to what we already had came about on whim - while we were at Michaels Arts & Crafts, we came across some of those inexpensive Halloween portraits they have that look like antique photos if you look at them one way, and scary demonic undead things if you look another way.

They are simply glued onto a plastic molded frame, good enough as a disposable ornament, but we decided against them because they looked as cheap as they were.

But then we saw this really nicely made roughed up cabinet-door style picture frame, which I would have wanted with or without a plan.

After the holidays, I'll replace the photos with more personal to us family photos, but for now...

We bought two of the cheap Halloween pics, and, after cutting them out of their molded frames (which was tedious and involved some non-ladylike words), put the one of the twin demon babies into the top section, and the nice gentleman that turns into a half-skeleton monster into the center section.

That left the two smaller panes unfilled.  Well, as it happens we have a really lovely antique store that is a two block walk around from our apartment.

(I  KNOW, RIGHT??! I AM SO DOOMED)

I took a walk down there to see if perhaps they had any old photos I could use for the bottom panes, and they did!  Sadly, not identified, but I selected one of two children looking very stiff and uncomfortable in their finery, and one of a mother for this little family. Her photo had faded with age, giving her a ghostly appearance.

The pictures did not quite fit in the frame, so rather than cutting them up, I scanned and printed them onto photo paper so they would be the right size.

I really like the end result!


My final decorated spot was outside on our balcony, where I was able to use a few more of my favorite goodies from the bin without making our indoor space look overly cluttered.

The Witch plaque hanging on the utility door was bought years ago from a dollar store, and still makes me smile everytime I see it.  Bright orange autumn flower garland is draped overhead, where we took a length of rope and wrapped it around a long metal beam for our various hanging needs - we use large S-hooks from IKEA to quickly add and remove whatever we want up there.

The two tin Witches Hats are also dollar store finds from years gone by - they have little doors so that you can set a tea light inside.  I have some remote controlled battery operated tealights in them to provide a bit of glow in the evening.


Even when it's necessary to keep things simple and easy to switch out, I find that being able to decorate for the holidays goes a long way toward making a new apartment look and feel like 'home'.  I may still be trying to figure out where I'm going to put my spices, but at least I know where the spooky stuff goes.


Monday, October 19, 2015

My Halloween Tree

11 comments:

Several years ago, I bought a wire ornament tree that stands about 3 1/2 feet tall.  It sits on a cabinet in  the living room year-round and I like to deck it out for the changing seasons. I'm not always very consistant about it - in the summer it tends to look uninspired and forgotten, but I love setting it up for Halloween and Thanksgiving, and on into Christmas, whether we get a larger tree or not (and with the kids all grown and gone, 'not' is what we decide more often than otherwise).

We even used the tree as a part of our wedding reception two years ago, wiring flowers to it and making small tags available to guests to write their well wishes on.

This weekend, I hauled out the Halloween decorations and set it up, and I love the way it sets off the room and pulls in so many fall colors.

I use a hodgepodge of goodies collected over the years.

Garlands of bright orange leaves, and another of grape leaves are draped among the wire branches to provide a base.

The small black eyed susans are actually remnants left from the wedding - my daughter had wired them on quite tightly, and I haven't been able to bring myself to remove them - so they peek out regardless of the season.

A few ornaments are specifically for Halloween - a set of black lace plush ornaments shaped like pumpkins witch's hats and shoes, a Hallmark 'candy corn' ornament, and a felt stitched skull I made a few years ago.  Others are more generic - rusty stars and bells, an owl, and a set of work carved deer.


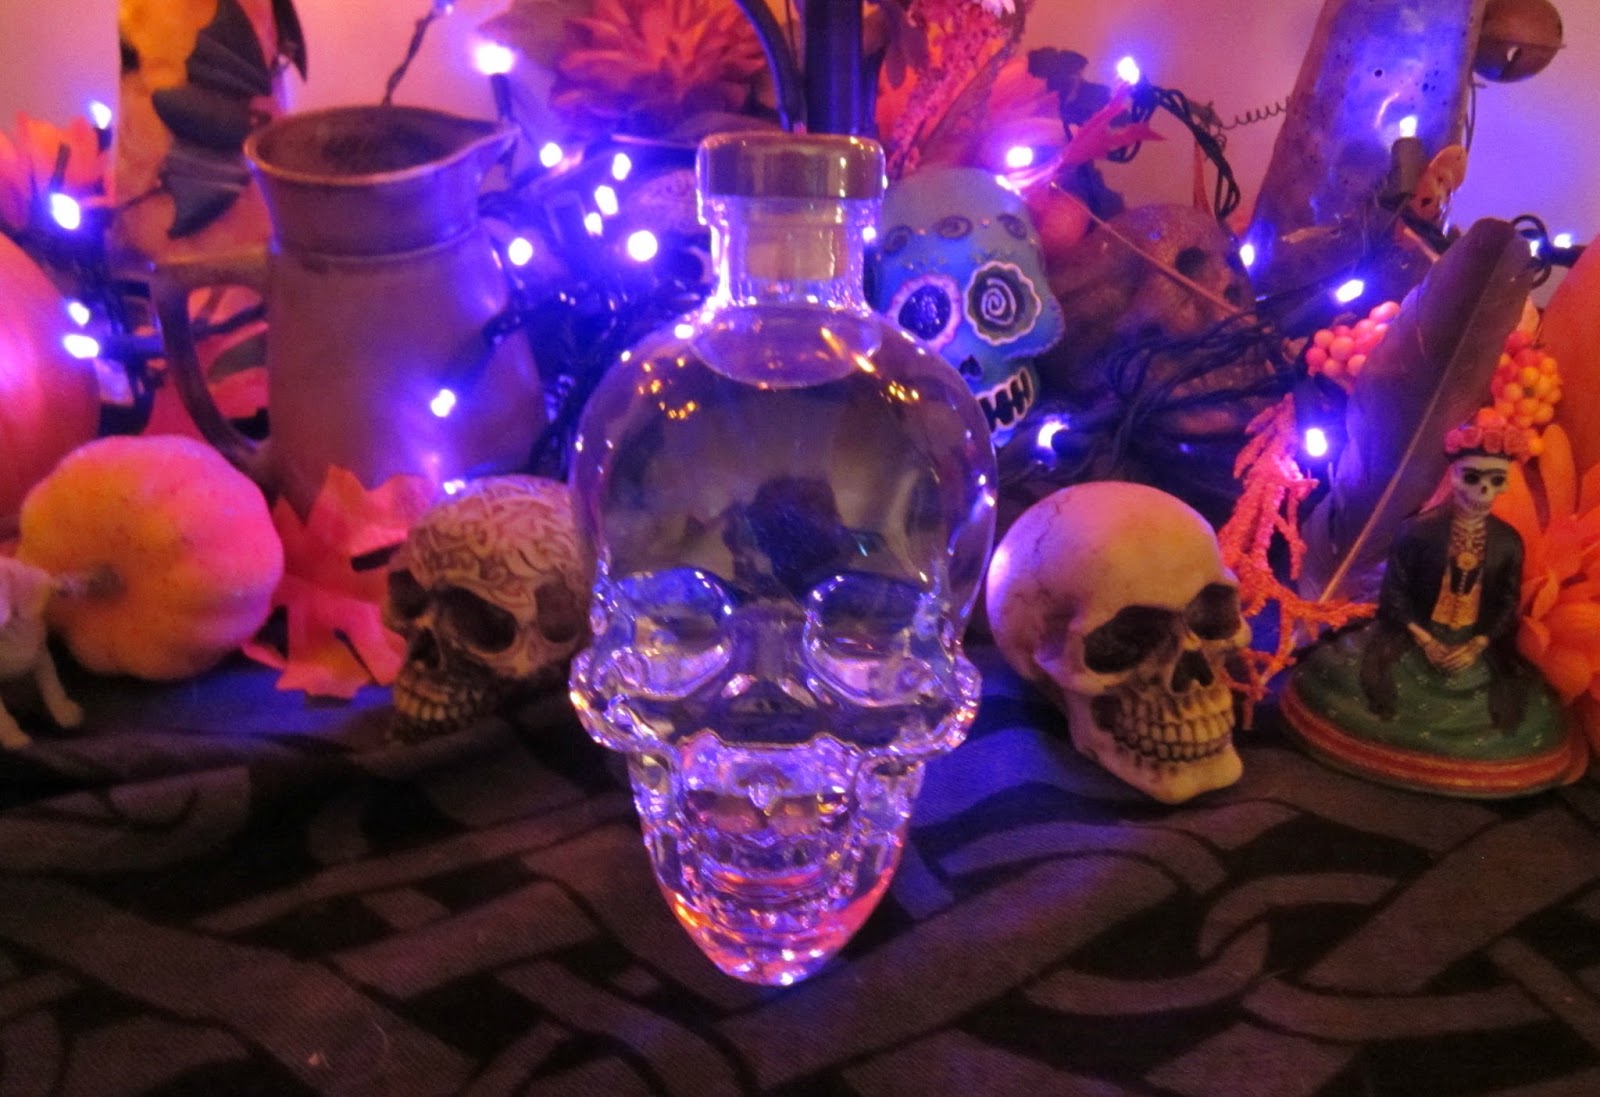
At the base of the tree, I laid out another flower garland, this one autumn hued chrysthanemums, and set out a pair of metal witches hat candle lanterns (they're pretty much buried by the other trinkets, and may get moved).  The centerpiece of the base is our growing collection of skulls, plain or painted, and a lovely Day of the Dead Senora figurine.  This year we've added a glass skull bottle from Crystal Head Vodka that makes me very happy!


We then decided to run some lights through it to brighten up the room - a set of candy corn colored lights were run through the tree, and some purple LED lights set below the tree among all the skulls.  A couple pumpkins almost completed the picture.


I thought I was done at that point, but remembered Elphaba - a wonderful knitted witch made by Gina Morley of Daydream Believer.  Elphaba usually hangs out in our office, and I almost forgot to add her to the fun!


I think it's done now, although my daughter and her family are about to arrive to stay with us for a few weeks before they head over to their new station in Germany.  I haven't yet met the baby (now 13 months old), and my older granddaughter is now six.  When she was a baby, she used to be fascinated by the year round tree, but they've lived far away from us for a few years now, and I am so curious to know if she'll remember it.

Either way, I'm hoping to get her to make me a few trinkets to add to it before they leave.


Monday, November 3, 2014

Day of the Dead Layered Dip

11 comments:
A Wilton Skull Cake Pan and a classic appetizer recipe turns Layered Bean Dip into a festive Day of the Dead specialty!


A couple months ago, Michael and I were wandering in a craft store, doubtless gathering supplies for something particular - but in the way of all craft store shopping, several random items found their way into our cart.

One of those random things was this cake pan - and it's a cool cake pan, isn't it?  Thing is, we officially aren't eating wheat (occasionally we unofficially are), so I do not make cake.

But, it was a skull! Skulls are cool!

There would surely be something amazing I could do with this, even if it wound up being holding candy for trick or treaters.

About a week ago I figured out what I wanted to do - we had a potluck coming up, and I decided to make a layered dip - but put it in this pan, decorate it with a few of the toppings, and hopefully wind up with a sort of sugar skull effect.

 Then, circumstances forced us to cancel our plans to attend the potluck, so last night this was dinner. And it was delicious!

Of course you can do this layered dip in any sort of casserole dip, but I do think the skull pan adds a special touch.

Day of the Dead Layered Bean Dip

1 lb ground beef
3 T. taco seasoning blend
1 sm can chopped green chiles
1 can refried beans
1/2 cup salsa
1 can black beans, drained
1 cup corn kernels
2 cups shredded cheddar cheese
1 cup sour cream
1 cup shredded iceberg lettuce
1 tomato chopped
1 sm call sliced black olives
avocado slices or guacamole (opt.)
1 diced onion (opt)
jalepeno slices (opt)
(add or subtract ingredients at will!)

1. Brown ground beef, season with taco seasoning blend and mix in green chiles.  Drain cooked beef and spread in pan.  Top with salsa if desired.

2. In a small saucepan, heat refried beans and stir in 1/2 cup of salsa.  Spread refried beans over ground beef in skull pan.

3. Top with a layer of drained, cooked black beans. If desired, top with a layer of corn kernels.

4. Spread shredded cheese over the top.  Bake at 375F for 15 minutes, until all is hot and cheese is melted.  Let rest for about 10 minutes, until cooled slightly.

5. If using guacamole, spread over the top. Spread sour cream over the top.

6. Cover with shredded lettuce.  Decorate as desired with black olives, tomato slices, onion, jalapenos, avocados, etc.

Serve with crispy tortilla chips or veggie sticks. Enjoy!

(On a total total side note, while we were putting this together, it occurred to us how very much this skull pan kind of looked like one of Doctor Who's Cybermen.  That could happen in the future...)


Our Three Peas

Weekend Recipe Link Up Party

Shared with:
~ A Round Tuit Monday, Amaze Me Monday, The Art of Homemaking, Busy Monday, Clever Chicks Blog Hop, Craftastic Monday, Homestead Barn Hop, Inspiration Monday, Inspire Me Monday, Mad Skills Monday, Making Your Home Sing Monday, Masterpiece Monday, Meandering Monday, Mix It Up Monday, Mommy Monday, Mostly Homemade Mondays,  Motivation Monday,  Much Ado About Monday, Munching Monday.
~  Anti-Procrastination Tuesday, Backyard Farming Connection, Brag About It, Create ~  Link ~ Inspire, Do Tell Tuesday, Good Tips Tuesday, Handmade Tuesdays, Hearth & Soul Hop, One Project At A Time, The Scoop, Share It Link Party, Show & Share, Take-A-Look Tuesday, Tasty Tuesday,  Tickle My Tastebuds Tuesday, Time To Sparkle, Tip Me Tuesday, TOO Cute Tuesday, Totally Talented Tuesday, Treasure Box Tuesday, Tuesdays At Our Home, Turn It Up Tuesdays, Tutorial Tuesdays, Two Cup Tuesday, You're Gonna Love It Tuesday. 
~ Centerpiece Wednesday, Fluster's Creative Muster, From Dream to Reality, Hit Me With Your Best Shot, Homemaking Linkup, Homemaking Party, Inspiration Board, Inspiration Exchange, Link Up Your Posts, Moonlight & Mason Jars, Penny Pinching Party, Project Parade, Show + Tell, Wake Up Wednesday, Wednesday Roundup, Wednesday Whatsits, What We Accomplished Wednesday, What's Cooking Wednesday, Whatever Goes Wednesday, Whimsy Wednesday, Wicked Awesome Wednesday, Wine'd Down Wednesday, Wonderful Wednesday, Work It Wednesday, Works For Me Wednesday, Wow Me WednesdayL, Wow Us Wednesday, Your Whims Wednesday.
~ Creative Ways Link Party, Full Plate Thursday, Home & Garden Thursday, HomeAcre Hop, It's A Party, Share Your Cup Thursday, Showcase Your Talent, Thursday's Favorite Things. 
~ Anything Goes, BFF Open House Party, Brilliant Blog Posts, City of Links, Crafting Along, Feathered Nest Friday, Flaunt It Friday, Foodie Friday, Freedom Fridays, Friday Favorites, Fridays Unfolded, Frugal Friday, Gluten-Free Fridays, Handmade Hangout, Home Sweet Home, Junkin' Joe, Kitchen Fun & Crafty Friday, Let's Get Real, LHITS DIY Party, Old Fashioned Friday, Pin Junkie Pin Party, Pinworthy Projects, Shabbilicious Friday, Show and Tell Friday, Weekend Re-Treat.  
~ Creative Collection, Dare to Share, Link Party Palooza, Make My Saturday Sweet, My Favorite Things Saturday, No Rules Weekend, Say G'Day Saturday,Simple Saturdays, Simply Natural Saturday, Super Saturday, Weekend Potluck, Weekend Recipe Linkup, Weekend Wind Down.
~ Creative Style, DIY Inspired, DIY Sunday Showcase, Happiness is Homemade, Nifty Thrifty Sunday, Share Your Creativity, Silver Pennies Sunday, Sunday Brunch, Think Pink Sunday.