Showing posts with label Amber McClure. Show all posts

Monday, November 12, 2018

Review: Luvsy Blankets

2 comments:

How many kids do you know that have one of those blankies that just won't leave their side for years? I know that all three of my kids have had them. Theirs are soft and satin(y) on one side and minky fleece on the other side. I really wish that they had adult sized ones of them, not that I would carry it around like they do (or would I?)

So, there's a fun company that was featured on Shark Tank awhile ago called Luvsy that has come up with the cutest little blankets and sleep sacks for little girls that I have ever seen! They are so soft, double sided with a design on each side and the inside is so cozy, you could easily curl up and take a nap.

The Princess blankets come in designs geared towards the pretty little princess in your life.

One in Lively Yellow (like Belle from Beauty and the Beast), Perfect Pink (which reminds me of Aurora from Sleeping Beauty), Rainbow (which is well, a rainbow dress) and Brilliant Blue (but of course, like Cinderella or even Elsa from Frozen).

They also have a Unicorn sleep sack!

I was given the Unicorn sleep sack to review and unless you live under a rock, you know how popular Unicorns are right now!

My 5 year old daughter almost had a panic attack when I pulled it out and showed her. She screamed and begged me to let her sleep with it right away. I gave in of course and she carried that thing around everywhere.

On one side of the blanket, there is a happy open eyed Unicorn. On the other side is a closed eyed sleepy Unicorn that we obviously used at bed time.


This review took me a while because, well, I could not tear this thing away from my daughters. They would constantly fight over it and I had to designate days that one could sleep with it and the next to the other sister.


Between the two of them fighting and sleeping with it, I had to wash it (twice). This blanket held up so amazing in the wash. I did not machine dry it, but hung it on the clothesline.

I am not sure how it would hold up in a dryer because there are sequins scattered over the blanket where the Unicorns hair (mane?) is.  It would probably be fine - I just haven't tried it.

Either way, the clothesline worked fine for us and there is no sequin out of place after weeks of constant love.

I cannot even tell you how much I recommend this product for the little girls in your life. Be it your daughter, niece, or granddaughter, you will be the BEST!

The Unicorn sleep sack costs a mere $34.99 and a really cool thing that they do is size it by age. 3-9 years old get one size, while ages 10+ get a bigger size.

The Princess blankets cost you $29.99.  Shipping is free for orders of $50, so get two!

Luvsy also regularly gives away blankets to specific shelters and hospitals around the country, and you can read up on who they're currently sponsoring on their Giving Back page.

According to their FAQ, they can also work with schools and organizations to provide products for fundraisers.

I am so impressed with the quality and designs on this product. I would definitely tell all my friends and family with little girls that they should check this company out!!


www.luvsy.com
https://www.facebook.com/luvsyinc/
https://www.instagram.com/luvsyinc/


Tuesday, September 4, 2018

Review: Cave Tools BBQ Grill Pan

2 comments:


Well here I am, back at it again with another Cave Tools grilling tool.

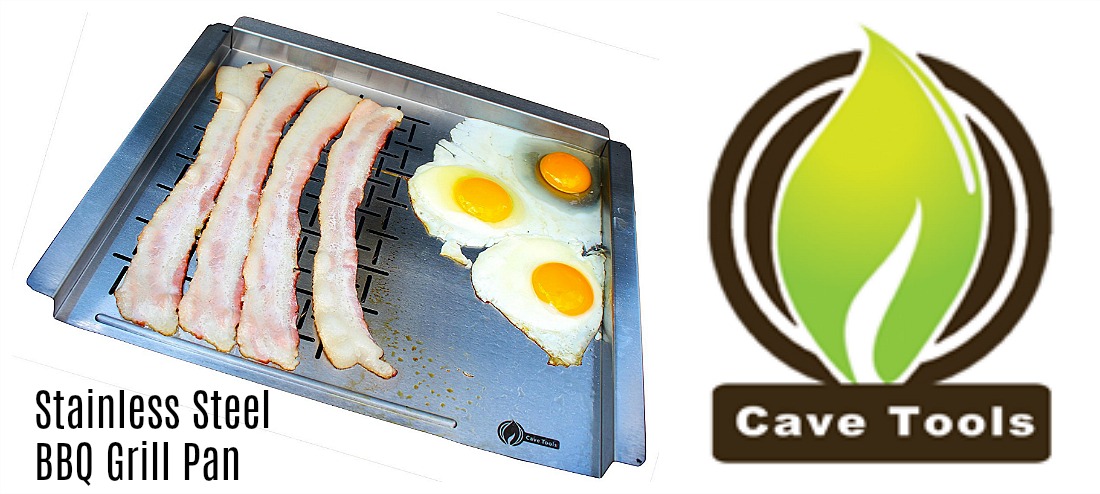
This time around, I have been given the Stainless Steel BBQ Grill Pan for review. This grill pan costs $17.99 on their website and $21.99 on Amazon, and is a two part pan: one side has drainage slots to cook meat (chicken, hamburgers, bacon), while the other side is a flat griddle side.


It shows on the packaging that this is suitable for eggs and bacon to be cooked over the grill. There are also illustrated examples of using this to grill chicken and vegetables at one time, or shrimp and mussels, or steaks on the grill side and salmon on the griddle side using a plank, making this a versatile grilling accessory.

I was very curious how one could make bacon and eggs on ONE pan ON the barbecue (how great would that be while camping??), so I tried it.

I started by warming up the grill and placing my Cave Tools BBQ Grill Pan on the heat, letting it sit for a little bit to get nice and hot before I added my bacon and eggs to it. 

I started with the bacon because, as we all know, bacon takes longer than an egg to cook!

I started with just 5 pieces - that is about all the room it has in the slotted section.

As my bacon was cooking, I noticed that it was cooking very inconsistently! Some parts were burning, some parts were still raw.

I am not sure why the pan was conducting heat so unevenly, but for me, the bacon was a complete fail.

I had to pull it off before I had a huge smoke cloud coming from my barbecue.

Burnt bacon is like a sin and I couldn't have that in my barbecue!

Lets move on to the eggs portion of this.

The griddle side was also cooking very unevenly. The outer part of the egg was cooking while the inner portion would not cook at all. I have to say that I left them on the pan for a good 10 minutes before I even attempted to flip them, which is really odd for fried eggs.


The outer whites appeared to be cooked so I tried flipping them. But no, even after 10 minutes, they were not cooked enough. I flipped and they just fell apart.

I want to stress - I am an experienced egg flipper, and no, it wasn't an error where the yolk broke.

The eggs simply just fell apart.

Neither side of the pan conducted heat evenly enough to do this job - and I'm glad I didn't ruin a good steak experimenting with it. 

Also, while you certainly want to make sure eggs don't dribble over into the grill openings, having it pull up into the corner of the pan would have made very unattractive fried eggs even if they cooked right.

If the uneven heat weren't an issue, I'd suggest egg rings for those to avoid that outcome.

My conclusion is that this pan does not work for me - however, it may work for someone who uses a charcoal grill over direct fire. 

We use a gas grill and have never had any issues getting it to a good temperature that evenly conducts the heat, but perhaps this is a situation where gas heat doesn't allow the pan to become as evenly hot as needed to handle a job like bacon and eggs.

I would have loved for this product to have worked for me, because one of my biggest pet peeves is having to clean pots and pans while I am camping! I just hate it! I would much rather be able to cook my full breakfast on one pan.. But this time around, I was disappointed.

As ever, Cave Tools is offering 15% off this products to our readers. Use Promo Code GRILLPAN15 at checkout on their website.

https://cavetools.com/
https://www.facebook.com/CaveToolsGrilling
https://plus.google.com/+Mycavetools/posts
http://www.pinterest.com/cavetools/
http://cavetoolsvideos.com/


Tuesday, June 19, 2018

Review: Cave Tools BBQ Brush (15% promo code)

No comments:


Well, here I am back with another great Cave Tools product! This time around I have been given a BBQ Brush for review! And just in time for all the summer time BBQ parties.

This isn't your typical run of the mill brush, either. Most brushes you buy from the store are a single bristle or those weird bristles that poke straight up which bend and are never the same after one use.

Cave Tools has made a triple bristle stainless steel BBQ brush.

What does that mean? Well, look at the design.. It is 3 full bristles that are clipped together for extra power.

The innovative way that they are positioned help you easily get in between the grates on your BBQ grill, which is where all the grimy build up happens.

To check out this brush, I started out with a grill top that had been previously cooked on. I believe we had made a tri-tip on it with sauce so it was extra gross and caked on.

As with all other brushes, we heated up the grill just a bit to make the baked on bits a little easier to remove.

Come to find out, that is an unneeded step with this brush! As soon as we started to clean the grill, it was just coming off with so much ease.

Normally we have to really scrub to get the stuff off, but not with the Cave Tools Grill Brush.

It cut our usual prep time in half which is always nice.

We were able to warm the BBQ up, clean the grate and cook within 30 minutes. I would highly recommend this to anyone!

This brush is also 100% rust proof so you don't have to worry about bringing in your tool after use. I always hated finding my brush damaged or rusted after forgetting it and letting it get rained on.

My only criticism (and it really does not even affect the product itself) is that the company logo on the brush was scraped half way off when it arrived. Maybe a little quality control is needed before shipping just to ensure that their logo (which is what customers look for) is looking perfect!


At only $11.99, the Cave Tools Grill Brush would be a great gift for the BBQ fanatics in your life - if you have a grill, you need this brush!

Cave Tools is offering our readers a 15% discount on the Grill Brush with Triple Stainless Steel Bristles if you purchase from their website.  Use the code BBQBRUSH15 at checkout.

Grill Brush on Cavetools.com
Amazon Listing
https://twitter.com/CaveTools
http://www.pinterest.com/cavetools/
https://www.facebook.com/CaveToolsGrilling


Friday, May 4, 2018

BBQ Chicken Lettuce Wraps with Cave Tools Meat Shredding Claws (Review)

10 comments:


Cave Tools has invited me yet again to review another one of their products. This time around I had the pleasure of using their Stainless Steel Meat Shredding Claws.

These handy tools are great for turning your slow cooked meat into tender shreds, whether you're doing Pulled Pork, Roast Shredded Chicken, Brisket, etc. I for one am a HUGE fan of Pulled Pork sandwiches (oh man, now I want one!) but I decided this time around to try some Pulled Chicken cooked in my Crock Pot.

These a pretty cool product that make quick work of a tedious task. Often I make chicken or roasts in the crock pot, and have to sit there with two forks trying to shred the meat. I usually get frustrated and get the knife out and end up cutting it up into chunks rather than actually shredding it.

The Cave Tools Meat Shredders really help! They have Non Slip handles that are textured with a hard type plastic that make them comfortable to use. The claws themselves are stainless steel, so of course, dishwasher safe like all their other products!


This product costs a mere $14.99 - - cheap for such a great product. I would definitely recommend this to anyone I know who uses a BBQ or Crock Pot for their meats. This would make a great gift for the grillers or cooks in your life! I think I have a person or two in mind who would absolutely love these.

Let's put them to work!

BBQ Chicken Lettuce Wraps
Prep Time: 10 minutes 
Cook Time: 8 hours on Low setting

2-4 Boneless Skinless Chicken Breasts
1/4 red onion sliced
1/4 green bell pepper sliced
a handful of chopped cilantro
1/2 cup of your favorite BBQ Sauce (I use Sweet Baby Rays)
Romaine Lettuce used for cups

Toppings can vary however you like; Sour Cream, Ranch, Cheese, Green Onions, Cole Slaw, Etc.

First, put the chicken into the crock pot. Season it as you normally would. I just used a little bit of Garlic Salt.

Slice up the onions, bell peppers and cilantro, and add it right on top of the chicken.

Add 1/2 of my BBQ sauce and stirred it all up to coat the chicken. Turn on your crock pot to LOW and set it and forget it.. OK don't forget it, but set a timer for 8 hours and walk away.

Once 8 hours have passed, remove the chicken carefully with some tongs and place it on a cutting board.

Get the Shredding Claws in your hands and press down onto the chicken. Start to pull the chicken apart.

Once you have it all pulled, put it back into the crock pot and add the remainder of the sauce, giving it all a good stir, and let it cook a little longer to heat through.

Prepare the Romaine Lettuce for wraps. I like to trim the tops because, in my experience, they are usually wilted just a bit. I also trim the bottoms because I personally do not like that white center that is in this type of lettuce.

Add the chicken into your full Romaine Lettuce leaves. Not overflowing but enough to fill it up and still have room for toppings.

For the toppings, you can go any way you want. You can make it into a BBQ chicken taco type wrap with sour cream and cheese plus some hot sauce. Or you can do how I like it and pour a little ranch over the top and some cheese and eat it up!

The Stainless Steel Meatclaws are available directly from their website as well as on Amazon.  I'm confident you'll find reasons to use them year-round!


Cavetools is offering our readers a 15% promo code when you decide to purchase a set of these Meat Claws from their website!! Just use MEATCLAW15 at checkout.


https://cavetools.com/
https://www.facebook.com/CaveToolsGrilling
https://twitter.com/CaveTools
https://plus.google.com/+Mycavetools/posts
http://www.pinterest.com/cavetools/
http://cavetoolsvideos.com/


Thursday, April 12, 2018

Asparagus au Gratin (#improvcookingchallenge)

13 comments:


This month's Improv Cooking Challenge, hosted by Nichole of Cookaholic Wife, is to make a dish that uses Asparagus and Cream!


If you're a blogger and would like to join the fun, check out The Improv Cooking Challenge on Facebook, their homepage, or look through some of the previous challenge entries on Pinterest.

April is officially peak time for Asparagus! Now, generally when I make asparagus it is on the BBQ wrapped up in bacon or just cooked in some butter and Parmesan cheese. I had to step up my game this month in order to participate in this challenge.

I have seen a ton of recipes for asparagus with a garlic or cheese cream sauce, and to me that just seemed a little too easy! When it comes to my cooking, I like to either make it super easy or go above and beyond. This time, let's go above and beyond!

So, Potatoes Au Gratin is one of my favorite side dishes and I have made this before with fresh green beans and also with broccoli, so why not try it with Asparagus? It sounds yummy to me!! So I gave it a try, This is what I did:

Asparagus au Gratin

2 bundles of Asparagus ( I bought the smaller sized ones for easier portion sizes with kids)
1/2 cup Mozzarella Cheese
1/2 cup Heavy Cream
3 slices of thick bacon, diced and cooked
Salt and Pepper to taste
1 cup Crunchy Onions (prepackaged)

Trim the Asparagus - if you have never cooked with this vegetable before, this is a MUST do step! The bottom portion of it is generally White or Purplish in color, and is woody and practically inedible. I usually cut about an inch or two off depending on how bad the coloring is at the bottom.

Once this is done, set up a steamer basket and blanch the asparagus. If you do not have a steaming basket, you can just dunk them in the water for a minute or two. Essentially you just want them to turn bright green in color, not necessarily make them soft.

Once you have finished this step, you will start the easy part of assembly.

Lay down the Asparagus in a glass pan covering the bottom. Add the Cream, then bacon, and season it with a little salt and pepper and give it a little stir.  Then add the cheese on top. That is it, so easy!

After this is assembled, bake in the oven at 400F for about 10 minutes. 

Add the Crunchy Onions on top the Gratin, spreading them to cover the top and broil for about 3 minutes, or until the cheese is completely melted and starting to get that delicious golden brown color.

Remove from the oven and let it sit for a minute or two before serving.

I served mine along side a delicious meal of Homemade Chicken Sausage and White Rice! My kiddos sure loved it, which is always a plus for me.


You really cannot go wrong with this recipe and I really hope you give it a try. Do you cook Asparagus a certain way that I should try? I am always open for new ideas - I can't wait to see what everyone else is doing with this challenge!

Here's what others are doing for this month's Improv Cooking Challenge.  Please don't add your general posts to this link up - head over to Party in Your PJs, or stop back in tonight and share with Awesome Life Friday instead!

Thursday, April 5, 2018

Tyed by DeDe Candles (Review)

1 comment:

Tyed by DeDe is a website where you can get a little bit of everything. For the most part they sell ties for kids and adults. (Is there anything more cute than a little kid in a bowtie?!)

You can also find several accessories you would need for a fancy outfit or wedding ensemble. Tie clips, Lapel Flower Pins, Tees, Hats, Tie Bars, Etc.

They also sell Candles.

When navigating their website, I found this very confusing because it looks to be an all clothing/accessory website, and then at the very bottom there are candles. At first glance, it appears to be only one candle, but if you click on the candle link and it takes you to a drop down with 4, 6, and 8 ounce candles in various scents.

They have the option for a 4 oz candles in a variety of scents, but there is no pricing on them so I am not really sure if they are actually for sale or not.

However once you click on "purchase" you then see a charge of $4.99.  6 oz candles run $6.99 and 8 oz candles run $8.99, so this may simply be a case of the website not being entirely proofread.

These candles come in nine different scents ranging from vanilla to some exotic scent options, like Jamaican Me Crazy! They are made with 100% soy and premium essential oils.

But then things get more confusing.

When on their Facebook page, I got a completely different understanding than on their website.

It looks as though on Facebook they offer seven different candles and they are all priced at $9.00.

There is no size listed, I am not sure why they differ in price and size from website to website but it is something to think about when purchasing.

For review, I was offered my choice of scented candle - I selected  the Mango Papaya scent.
When I emailed their customer service via Facebook, I was told the candle was $9.99, so as of right now, I really do not know what the true and accurate pricing is for this product.

With so much confusion between the websites and email, this would turn me away from purchasing just based on this fact.

In addition, the product I received looked nothing like the candles that they have on either of their websites.

The ones that are featured on their sites show clear or black candles with a cute sticker "My name is ____" with the flavor labeled on it.

The one I received was a metal container with a Tyed by DeDe sticker on it. There was a little label on top that said the scent and that it was made in Brooklyn, NY.

The candle burns fine, like your typical candle does, it smells really nice when burning.  Once I blew the candle out, maybe after two hours, I was still able to smell it throughout my living room for a while.  The color of the wax was really pretty, too, although it was hidden inside the metal tin.

These would make a fine gift if there were one of two differences - it needs to be bigger in size or cheaper in price!  Especially since the decor value is minimal, given that it is overtaken by the company logo.

For me candles need two qualities, good long-lasting scent and reasonable price. I am a pretty simple girl who likes to find great smelling candles for cheap, and let me tell you, they are out there! I have found my favorite candles at Walmart for under $6 and for a 16oz at that.


Tyed by DeDe's candle did smell great either lit or unlit (cap off of course), so they've got the good scent part down, but $8-$9.99 for a tiny little candle? That would be a big no from me! I would definitely pass on purchasing this in the future.

All that said - if you have a little boy in need of an adorable tie or suspenders - definitely check  them out!

https://www.facebook.com/TYEDbydede/
http://www.tyedbydede.com
http://instagram.com/tyedbydede
http://tyedbydede.tumblr.com/
http://twitter.com/tyedbydede

Thursday, March 15, 2018

Kebabs with Cave Tools Stainless Skewers (Review)

10 comments:

Cave Tools is back at it again! I always joke that my cupboards look like they are sponsored by Cave Tools and the more I review, the more and more it is true! I am now on my 5th product from them, and again am not disappointed!!

This time around I chose to review their 17" Stainless Steel BBQ Skewers... Kebabs anyone?

Now the kebabs I have had in the past come on the bamboo round skewers full of meat and veggies. I am always worried with those type of kebabs that I would get splinters in my food when I pushed them down the stick, and that is if you can even get it to come down, because most times it sticks.

You have to soak the sticks in water for a couple hours before you cook with them so they do not burn... ugh how inconvenient!

Well, Cave Tools has done what they do best - they have taken a simple product, and revamped it!

These skewers are 100% Stainless Steel.  They are flat in shape so you don't have to worry about them rolling when you put them on the grill, and they have this really cool ring at the top that pushes the food down for you!

Along with all those cool features, these 10 skewers come in this sweet little red bag that you can hang right on your BBQ for next time! It is really nice to have the bag to put them in, so they are not taking up a whole drawer.


My one main criticism (well my husband's since he was the one actually BBQing) was that they are all metal so when it comes time to flipping, you really have no other option but to get an oven mitt to protect you from burning yourself.

If I could give one suggestion to Cave Tools, it would be to have some sort of silicone holder at the end that you can grasp.

It was actually really tough for my husband to flip them over, because our oven mitts are apparently fluffy, so when he went to grab, he couldn't get underneath it. He used a little ingenuity and took a spatula to lift it up into his oven mitt and flip it.

A little inconvenient for the cook, but overall a pretty satisfying product otherwise. I really enjoyed the ease of the ring to push the food off - - completely genius!

As with all their products, these are a dishwasher safe product with a lifetime guarantee.  The ten skewers with bag costs only $17.99! I would buy this product in a heartbeat. This price is great for the quality that you are getting. Check out their website and see what other things you can add to your collection! I know I have my eye on a few more things!

So with all of my reviews from Cave Tools, I have included a recipe.

Well guess what? I have come up with three separate recipes to make your next set of  kebabs!  In each case, you could make skewers of meat only, or thread the meat with a variety of vegetables and fruit, such as pineapple.


Lemon Pepper Chicken
This recipe is a simple one using a store bought marinade from Lawry's.

1 full bottle of Lawry's marinade
3 large boneless chicken breasts, cut into cubes

Let the chicken soak for about 2 hours in the marinade and then add to your skewers.

Dry Rubbed Steak
This one is a dry rub that crusts the outside when seared.

1/2 a trimmed Tri Tip, cut into cubes (trimmed of excess fat that is always on the backside of a tritip)
A handful of Gourmet Prime Rib Seasoning (we get ours from Costco, soooo good)
2-3 dashes of Cayenne Pepper
A dash of Garlic Salt
2-3 dashes of Seasoning Salt

Mix this all up and generously rub all over the meat cubes. Let it sit in the fridge for about 2 hours and then add to your skewers.

Green Steak
This one is a mix of some fresh veggies and herbs. It pairs really well with onions and peppers.

I used my hand processor for this, but if you do not have one, just dice it up as small as you can so it can infuse all the flavors together

a handful of Cilantro, stems and all
1/2 a medium size Red Onion
5 cloves of Garlic
A dash of Oil to make it a little easy to spread onto the steak
1/2 a trimmed Tri Tip, cut into cubes

Get all the ingredients except the steak into your mixer and puree until it is all mixed up. Add to the steak cubes, and let it sit in the fridge for about 2 hours and then add them onto your skewers.

I hope you try and make your own skewers and mix it up a little bit!

You can really go any direction with your veggies but I will tell you what I had on mine just so you have an idea.

For the Lemon Chicken and the Dry Rubbed Steak, I added sliced red onions, sliced red and yellow bell peppers and mushrooms.

For the Green Steak, I added all of the above but also added pineapple onto my skewers as well.

If you're serving several people, you could even lay out a buffet of kebab items and let each person thread their own skewer! Just be careful to provide utensils so that multiple fingers aren't touching raw meat and the various vegetables without washing.

You really can season, marinade or choose how to cook these! BBQ is the best, but you can bake kebabs as well.

I have a bunch of kiddos, so we paired our skewers with some Mac and Cheese and some corn. As with any BBQ item, the side dishes are endless.

What's your favorite way to use skewers? We'd love to hear from you!

You can buy these Cave Tools Skewers from Amazon or directly on Cave Tools website - and if you purchase from their website, you can have them at a 15% discount when you use the code SKEWERS15 when you check out!


http://cavetools.com
http://cavetoolsvideos.com/
http://www.pinterest.com/cavetools/
https://plus.google.com/+Mycavetools/posts
https://twitter.com/CaveTools
https://www.facebook.com/CaveToolsGrilling


Thursday, February 8, 2018

Carne Asada Fries #improvcookingchallenge

14 comments:


This month, I decided to join in the fun and participate in the Improve Cooking Challenge, a monthly collaboration in which bloggers cook a dish that combines a couple of foods - this month's theme is Steak and Potatoes! I mean really? These are staples in my household. We have some sort of steak at least every other week and almost always have potatoes to go with it.


For me, steak can be cooked and enjoyed so many ways. There are so many cuts of steak that the possibility are really endless! My choice was easily made by my family's favorite food genre, Mexican style!

I decided to go with homemade Carne Asada Fries! Carne Asada is a seasoned Flap Steak (also sometimes called Sirloin Tips, and generally a thin cut of meat) that is generally used as either a main dish with sides or used in burritos. I'm sure you have all heard of a Carne Asada Burrito!

Where we live in Southern California, we are super close to Mexico and are blessed with being able to eat as close as it gets to authentic Mexican food.

Carne Asada fries originated in San Diego (where I am from and live).

It comes with a plate of fries topped with beans, steak, guacamole, cheese and sour cream. Doesn't that sound amazing? Ugh, I am starving as I write this!!

Generally, you see Super Nachos or Carne Asada Nachos on a menu, but most restaurants have only recently added the fry option to their menus. It is a highly popular item and full of goodness!

I would say 98% of the time that my family goes to order Mexican Food either in a restaurant or a drive thru, my husband gets these fries!

It is almost a guarantee that this is what he wants. So with that in mind, why not try my hand at making them at home for him?

I went to my local grocery store, Stater Bros., and went to the meat counter, selecting 1lb of pre-seasoned Carne Asada.

You can find this usually in Citrus flavor as well as Rancheros. I always opt for the Rancheros flavor. It has more heat than the Citrus one.  If you don't live where State Bros. is, a fast Google of  'Carne Asada Marinade' will give you plenty of options - just add a day to your preparation to give the meat time to marinate.

The amazing thing about these Carne Asade Fries is that you can add whatever you want to them to top them how you like. I chose to make mine simple and to the point!

As you're planning to do this, don't forget to give yourself a few hours to let the potatoes soak and to allow for drying times along the way - this is going to give you restaurant perfect French Fry perfection!

Carne Asada Fries
serves 4-6

1 lb. flap steak, marinated in Carne Asada marinade

Homemade French Fries
5 large Russet Potatoes
Oil for frying
Water salted with 1 tablespoon  salt

Toppings, as desired
Sour Cream
Shredded Cheese
Sliced Avocados
Diced Onions
Diced Tomatoes
Canned beans (pintos, kidneys or black beans)

(I would usually top mine with beans, BUT I completely forgot to buy them when I was at the store!)

French Fries Preparation:
Peel potatoes, the cut into french fries. The easiest way I have found to do this is to slice the potato in half, than cut that half into 3 vertical slices, then cutting each slice into sticks. This keeps them from being too thick and it is easier to cut them the same size(ish).  This is important so that they all cook at the same speed.

Add the freshly cut potatoes to a pot of cold salt water and let them soak for 2-3 hours. This removes the starch from them and makes them puff up and gives you that wonderful 'tender inside crispy outside' french fry texture when they're fried.

Once this step is done, remove them from the salted water and let them dry off on a clean dishtowel or a bunch of paper towels. Let them dry for about 30 minutes - you want to make sure that they are dry, or they will pop and not cook properly once added to the oil.

Once dry, heat up oil to about 325F (on my stove, this was the lowest setting of 2 - use an instant read thermometer if necessary to check your temperature).

The point here is to try to cook them before the actual fry. Cook them in the warm oil for about 8 minutes. You want them to still be white on the outside like when you put them into the oil.

Remove and drain them, letting them rest again (30 minutes or so).

This is a good time to put together the toppings and set them aside.  If you don't have an assistant to cook, you may want to do the meat now, too, so the fries are at their fresh, hot best come serving time.

Using the same pot and oil, turn the heat up to about 375 (again on my stove, it was at a 5). This is when you will "fry" them up. Cook until they are crisp to your liking.

Once you remove to drain them, that you make sure to give them a quick shake of salt while they are still drying. This will make sure that they hold the salt onto them and have a little flavor!


To cook the Steak:
Generally, I like to grill the carne asada to crisp perfection, but sometimes it is just easier to fry it up on the stove, especially on cold days!

Start by heating up the pan on the stove to medium high, and sear the meat to your preference. It only takes this meat a few minutes to cook, as it is sliced very thin to begin with.

Once the meat is cooked, let it rest a couple minutes and then slice it up into little bite size pieces.


Assembly!
Once your fixings are all prepared comes the fun part!

Start with a pile of fries, top with some cheese and give it a quick blast in your microwave to melt it a little bit. (you may not need this step if your fries are still piping hot)

Once this is done, it is time to add the meat, a little more cheese, your sour cream, onions, tomatoes and avocado slices! Add as much or as little as you like.

The great part is - everyone can top theirs to their own taste!

I hope you all enjoy making these! They are delicious and I think you'll enjoy this fun little piece of San Diego!


Be sure to check out the other Improv Cooking Challenge Steak and Potato entries!  You can check out past entries on the Improv Cooking Challenge Pinterest page, too!


Note: This link up is only for Improv Cooking Challenge entries - if you'd like to join in, please join the Improv Cooking Challenge Facebook Group and see what's coming next!

Otherwise, I'd love to see you share your non-related posts with Awesome Life Friday and Party in Your PJs, right here on Reviews, Chews & How Tos!


Friday, January 19, 2018

Cave Tools Burger Press - Spinach Feta Burgers

10 comments:


So we all know that making hamburgers at home can be daunting when not using the frozen patties that you can buy at the store can be daunting.

Unless you are a pro (which I am not), you either get patties that are entirely too thick and don't cook all the way through without burning, or you get the uneven patties that may have thin sides and thick centers.

Cave Tools has come to me again to review another one of their great products, this time around I am reviewing their Burger Press.  If, like me, you find shaping burger patties to be a chore, this may be your savior!

The Cave Tools Burger Press perfectly forms 1/3 or 1/4 pound burgers that will cook evenly every time.

It is a circular heavy metal item that has a lid with a plastic handle that makes it easy to operate.

This useful gadget rolls in at a mere $11.99, and when you purchase this item, you also get 200 burger papers as well. These let you batch-prep a bunch of burgers ahead of time and freeze them, using the burger papers in between each patty for easy separation! Pretty cool.

It is a rare treat when I feel the need to make my own burger creations rather than buy the frozen patties, but the Cave Tools Burger Press made it easy enough that I think I will use it now and then, for sure, especially for specialty burgers that are more than just shaped beef.

My only complaint is that pressing down on the handle to "smoosh" the burger did hurt my hand, in spite of plastic handle.

Not 'oh my god I am in so much pain', but it was definitely an 'ugh this is annoying' pain.

I did pack the press to the marker but maybe I had too much which is why it hurt. 

I would need to work out some way to pad my hand before I'd try making a lot of burgers at one time for the freezer.

In spite of that one caution, I would definitely recommend this to others who love to cook and BBQ!

Of course, I couldn't resist making up a yummy hamburger recipe for this review!

Right now, we are trying to do a low carb diet, so my recipe is lacking the bun ( you can easily add this burger right onto a bun and have it taste just as amazing!)

These burgers turned out so well that we didn't even need to add a dipping sauce on the side!  We used beef for these, but they'd also be delicious made with ground chicken or turkey.  To make a larger batch, just double or quadruple the ingredients as needed.

Spinach and Feta Bunless Burgers
(makes 2 burgers)

1/2 pound of ground hamburger
1 handful of fresh spinach
1/4 cup crumbled feta cheese
Garlic salt to taste (you can do salt and pepper to taste, we are just garlic salt lovers in this family)

Combine all ingredients and mix them all up in a bowl.  (Don't overwork the meat or your patties will be dense and dry.)

Use a burger press and form your perfect patties!

How long you cook them is dependent on your preference. I personally am a weirdo and like mine well well done! No pink, completely dead, lol. I cooked mine about 8 minutes on each side. 

If you're using ground poultry, make sure you're cooking them all the way through.

(These would easily be amazing on the grill as well, but I cooked them on my stove-top.)

Once I took my burgers out of the pan, I placed them on a napkin to drain a little bit of the residual grease. This is a step you can skip if you BBQ them.

I paired these burgers with a great green salad and a side of Tortellini Alfredo! You can go so many directions with what sides you choose to make with these yummy burgers. Be Creative!

Give the Cave Tools Burger Press a try! 
They are offering 15% off of this product for our readers - 
Just enter BURGER15 at check out on their site!

You can also purchase Cave Tools products on Amazon.

https://cavetools.com/products/burger-press-patty-maker
https://www.facebook.com/CaveToolsGrilling
https://twitter.com/CaveTools
http://www.pinterest.com/cavetools/
http://cavetoolsvideos.com/